

Clean Architecture - Planning and Initial Setup
Aesthetic designs require ample planning


Photo by André François McKenzie on Unsplash
Goals
This is the planning tutorial, which is part of a more extensive CLean Architecture tutorial series. What we set to achieve
- We will look at several modularizing solutions for our application.
- Set up modules for our Github profiles project
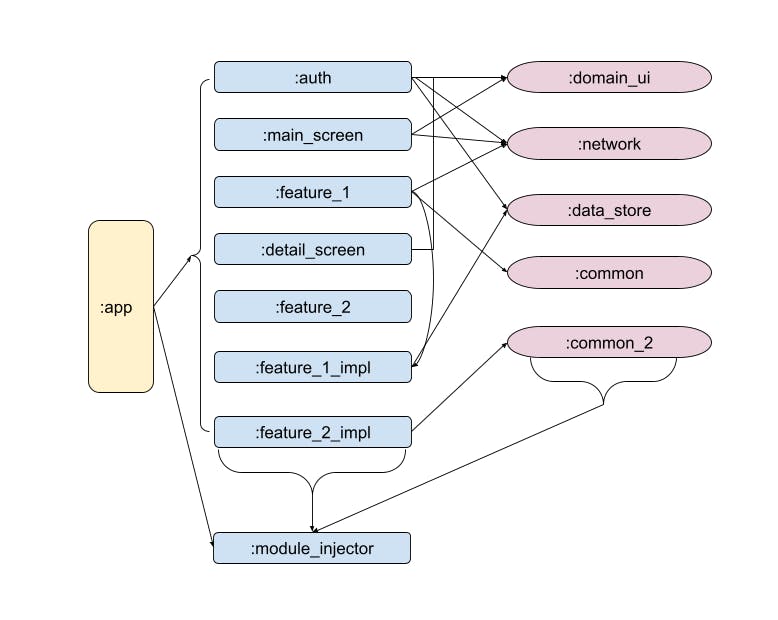
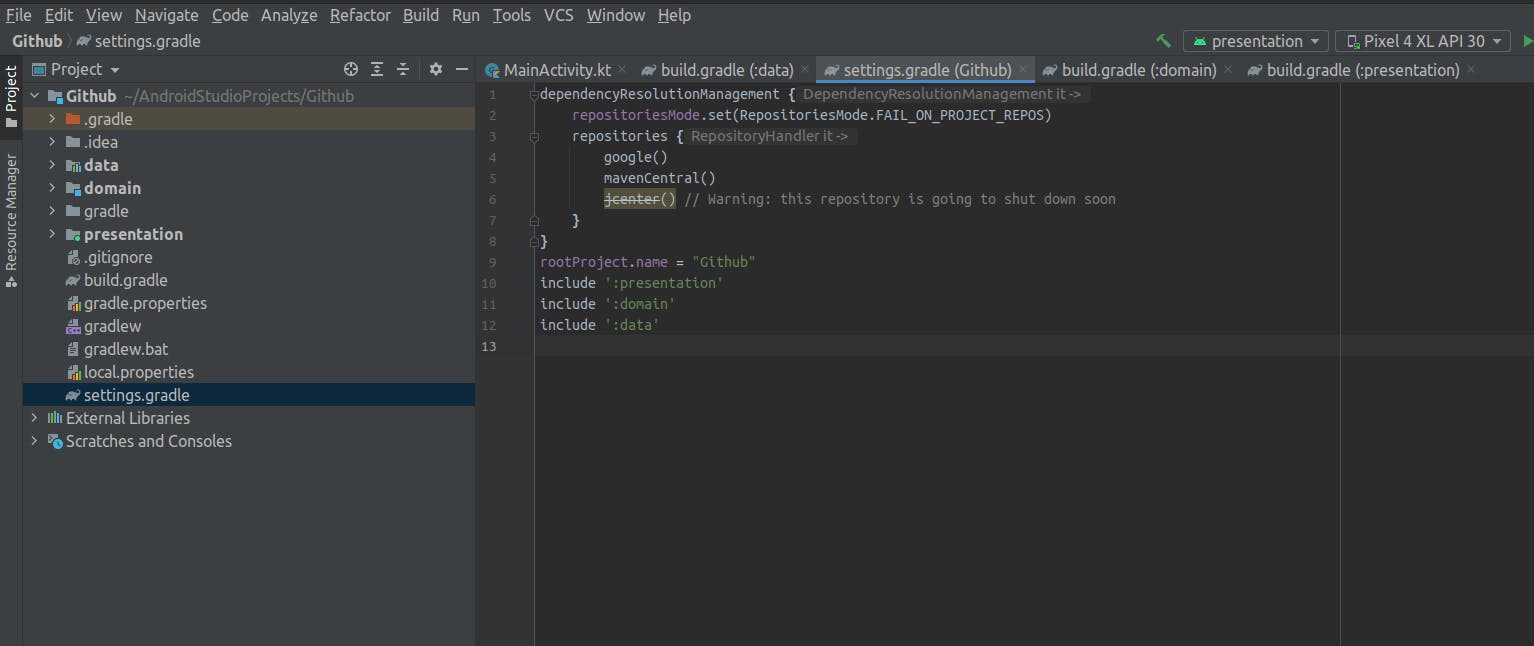
The project structure after this section will be as below.

By the end of the tutorial, you will have a gist of how to think about modularizing your application and setting up a modular android project.
Project Overview
We will build an Android app to get GitHub Profiles following clean architecture guidelines. The app will fetch data from the GitHub API, save it in the local database, and display it on the UI.
This section will do the planning, which is the first and most crucial step in any project. In some cases, the planning has already been done for you, and you have to get right ahead, set up the environment, and start building the software. However, there are scenarios where you will be required to do the planning. For example, when you become a senior dev, you will spend a lot of time planning the application, selecting tools, and ensuring the software implementation is according to the plan.
Modularizing
We are separating the application into several modules. Modularization has several benefits for your organization. Some of the advantages are:
Delegation - If you are building an application that will get beyond a few developers, you will need to delegate different sections to different developers or teams. Dividing the application into modules centralizes the scope of each module, making it easy to delegate. A few developers can own a section of the application, and develop and test without stepping on each others' toes. The team can experiment with their module without affecting other developers' work.
Code Reusability - We want to re-use pieces of code as much as possible, and avoid repetition when we can, using the DRY principle. When you modularize your application, you make the code easily reusable.
Build Speed - One of the critical advantages of modularization is increasing build speed. Build speed can be a challenge in large applications. Modern applications are usually large super apps with different sub-apps. Building such an extensive application would take a considerable amount of time. Debugging would also be a big issue. When you modularize your application, you have several options which improve your build speed. For example, you can run the applications in parallel, or run a single module where you applied changes that drastically reduce the build time and improve productivity.
You can watch this video by Yigit Boyar and this talk by Marvin Ramin
Modularization Process
Modularizing apps is similar to choosing architecture for your house; very opinionated. There is a debate over how you should modularize your application. It is highly dependent on your application, team, specific needs, and your bias. There is no rule of the thumb.
However, there are excellent, medium, and obviously poor modularization decisions like any other engineering practice. Some modularization practices are easier to implement and maintain, while others take you down the rabbit hole. Choose what will not hurt your developers.
The three common patterns are
- Modularization by layer - divide your code into respective architectural layers: domain, data, and presentation. The three layers in the app have a distinct function. The data layer is concentrated on data-related logic, i.e., fetching data from the remote data sources, handling local caching using room and datastore libraries, and repository implementation. The domain layer has a single responsibility of managing your business logic, where you have your business logic models, repository interfaces, and use-cases. Your presentation will have your screens and their presentation. This has been useful in small teams. If you have never modularized your app before, this is a great place to start off with modularization because you can visualize what every module does. However, if you are a big team/ your application has like 20 screens and or have like 5 data sources, you need to consider looking at other available options like feature modularization.
- Modularization by feature - divides the code into what it does, mostly the screen it represents. Here, each module holds the logic for a specific area and scree. For example, your login logic would be a module to handle logic-related logic only. This option makes it easy to experiment with different options. If you want to try a new feature in a small market, you can have a few engineers implement and ship that feature without bothering the main application. You can deliver dynamic apps with feature modularization. If you have 30 features in your app, a team can handle each feature independently without dragging each other behind. The challenge with this modularization is as the app get's bigger, there is a high chance of code duplication. One team will write like 30% of the code that another team wrote and tested. Hybrid modularization is highly recommended and used in large apps to avoid duplication.
- Hybrid modularization - This is a combination of both layer and feature modularization, with an additional, with an additional module injector class that contains base abstractions and glues all the modules together. There is no rule for hybrid modularization. However, if a module is reusable, like checking network connectivity, or independent, as an app for wearable, it is a great candidate for a single module. Here is an example of how modules in hybrid modularization interact.
Modularization can be a silver bullet for one team, and a rabbit hole for another. Always consider your situation.
What we have
This is a minimal application. We will divide it into three modules.
- Data module - this module will hold data-related logic. It is an Android library that contains both local and remote data. In robust application, we would have done some separation. For example, we would have remote data, which is only responsible for remote data, and local data which handles caching. In such a case, the remote data module would be a Kotlin and Java library, while the local data would be an Android library.
- Domain module - Pure Kotlin and Java library that holds business logic information. It has our business logic models, single source of truth, and use cases.
- Presentation module - all UI-related logic. We will have UI, UI-State, and ViewModels logic for all screens in the app. Working with a large application, we would have separated the layer into different modules to hold precise and independent UI logic. However, since our app is small, we will excuse ourselves and make it a single module.
Setup
Now, let's set up the backbone for our project.
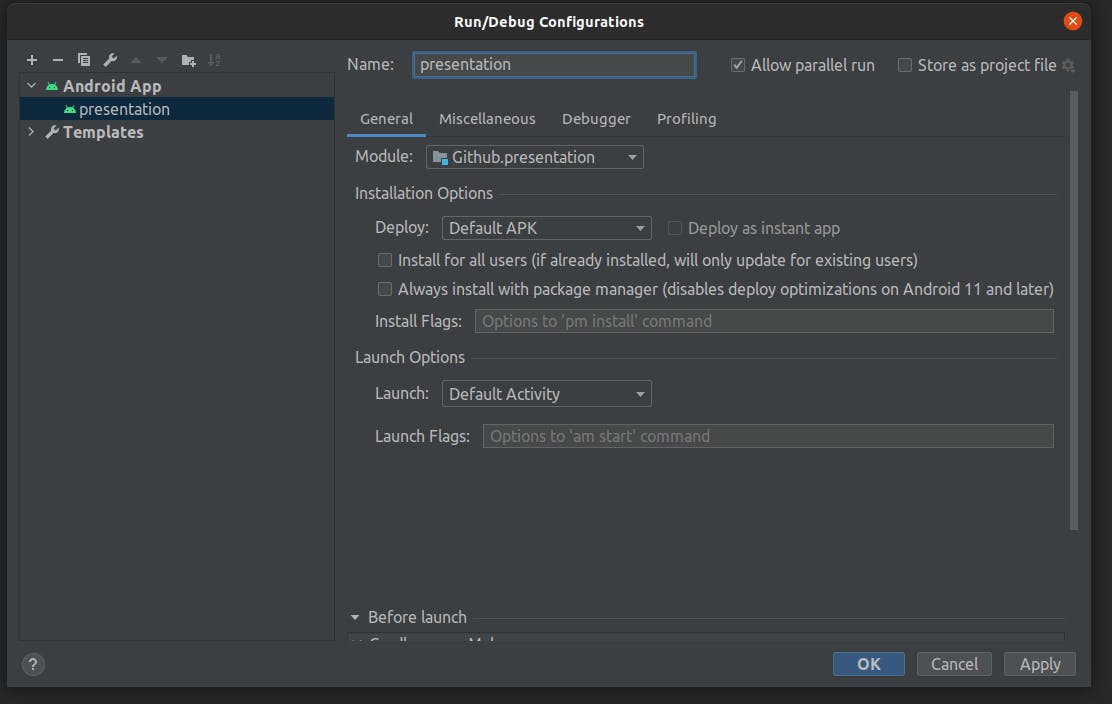
Create a new project Start a new project in Android Studio (You can also use one of your side projects) When Android Studio builds your project, refactor the app module to presentation, because that is what it will do in this project. You can also leave the module as the app.
Go to
App => Refactor =>Rename => Rename Module
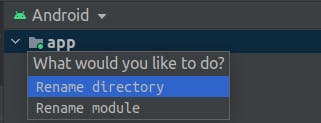
Rename to presentation
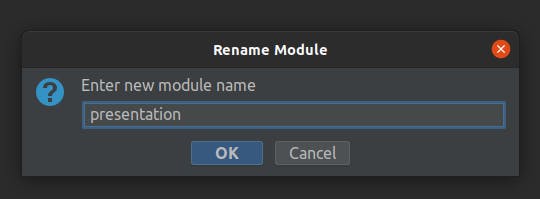
Change the name from app to presentation the Project Structure.
Add Data and Domain Modules The domain module will be a pure Kotlin library, without any reference to Android libraries. The data module will be an Android library since we have caching logic for room and datastore libraries which are android frameworks.
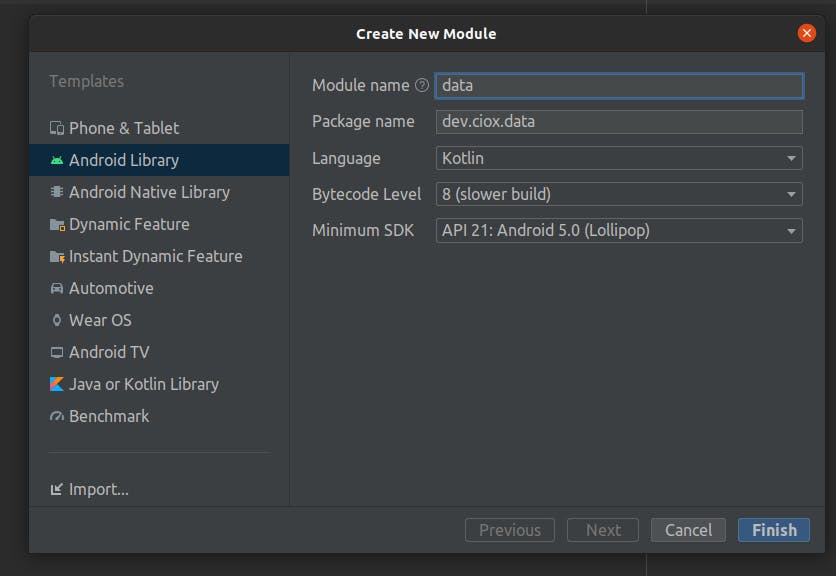
To add the data module,
Project View => New ⇒ Module ⇒ Android Library
Name the module data.
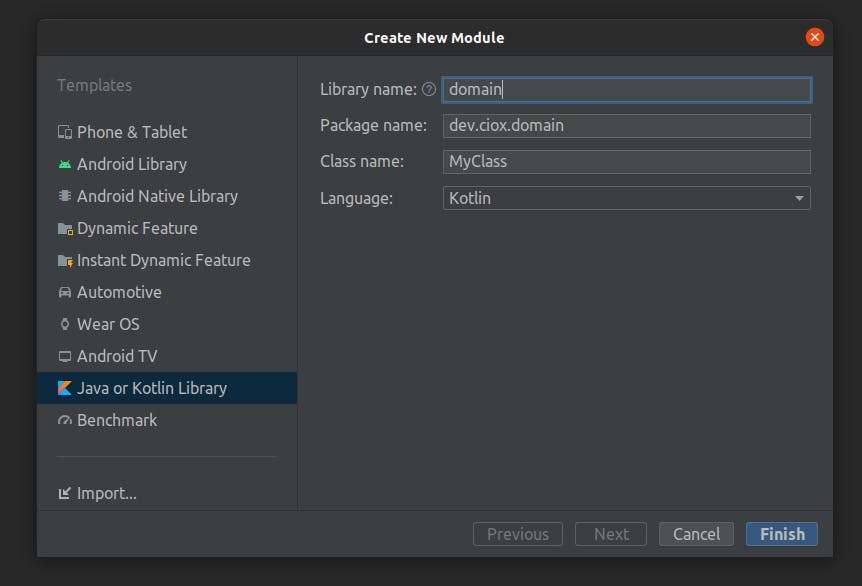
Next, we add the domain module.
Project View => New ⇒ Module ⇒ Java or Kotlin Library
Name the module domain.
Wait for the project to sync. At this point, we have a multimodule application.
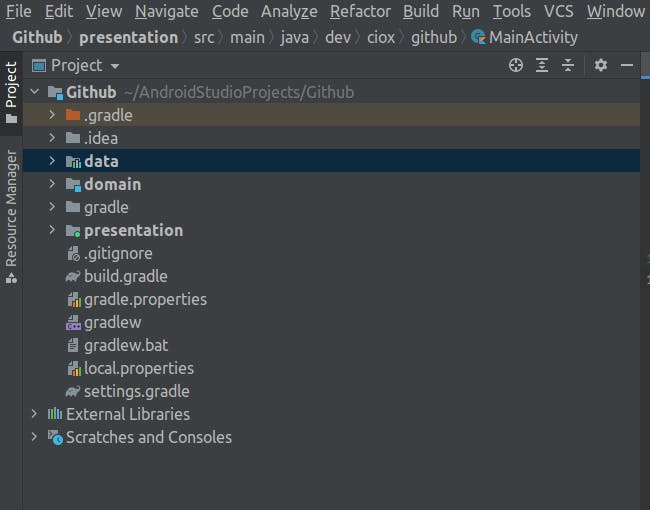
Note: The dot at the presentation folder shows the module can be bundled with an android application because we have the android application plugin
plugins {
    id 'com.android.application'
    id 'kotlin-android'
}
Android library has three bars, and Kotlin library has a small blue square.
This is how our dependencies look like
settings.gradle file
Domain level dependencies

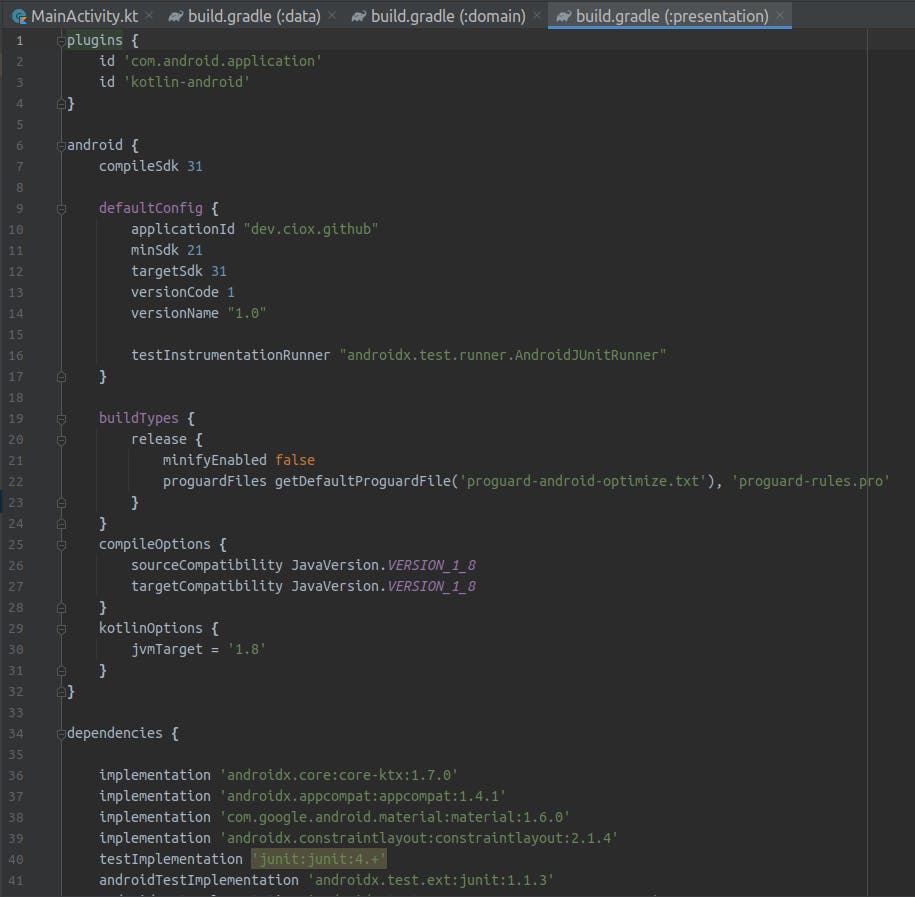
Presentation level dependencies
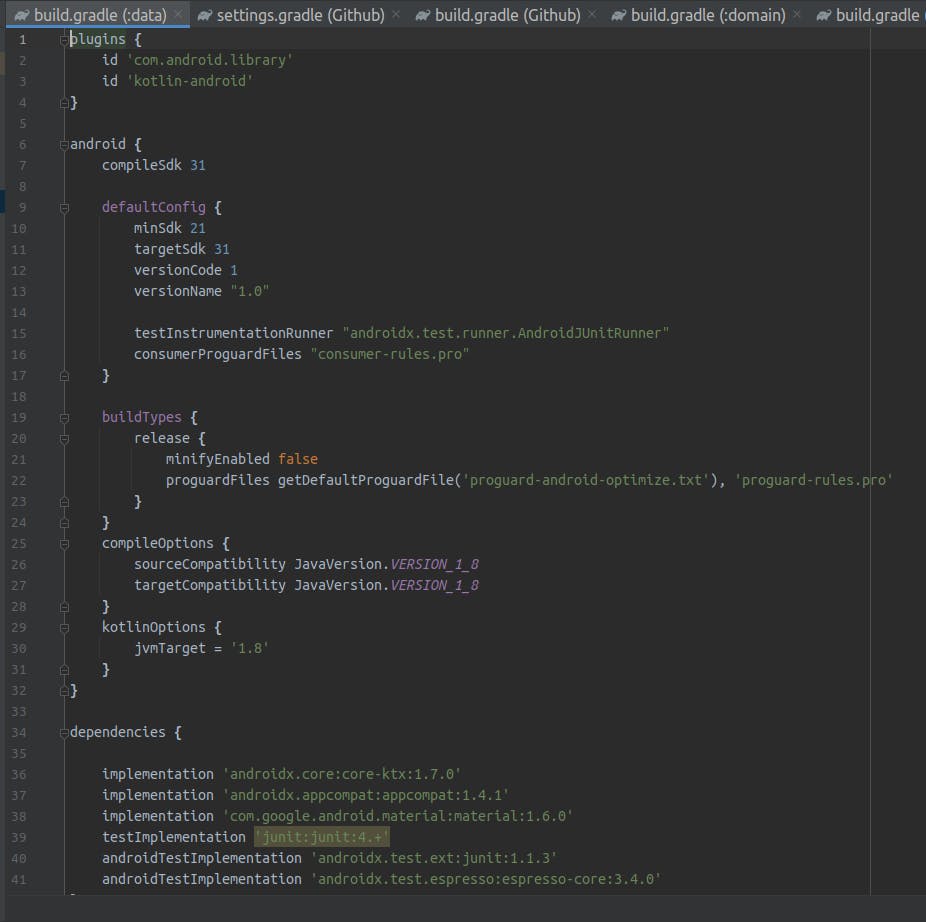
Data level dependencies
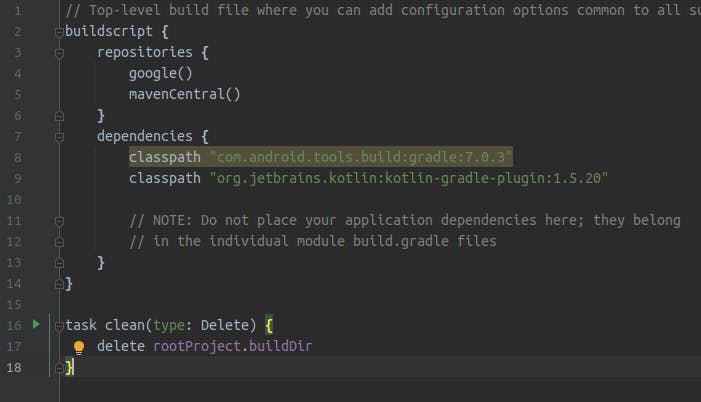
Project level dependencies
That's it. We no longer have a monolith app, but a modularized one.
Next, we will configure Kotlin DSL. Although advisable for large projects, it is perfectly fine to manage dependencies with Groovy.
If you have questions, contact me through my socials. You can get the code from Github, the first commit.